Dexciss Technology - Current Fiscal Year Ending and New Fiscal Year Starting Checklist
Dear Customer, As we know, from tomorrow the new fiscal year going to start. Hence, we are writing here to know our customer what changes need to be done on ERPNext.
Dexciss Technology Pvt. Ltd.

Current Fiscal Year Ending
&
New Fiscal Year Starting Checklist
Posted By:
Siddharth Jain,
Project Manager,
Dexciss Technology Pvt Ltd
Table of Contents
Table of Contents
1.Fiscal Year
2.Naming Series
3.Accounting Period
4.Period Closing Voucher
5.Budget
6.Tax Withholding Category - Adding New Fiscal Year
1.Fiscal Year
A Fiscal Year is used to record and report the transactions for the year.
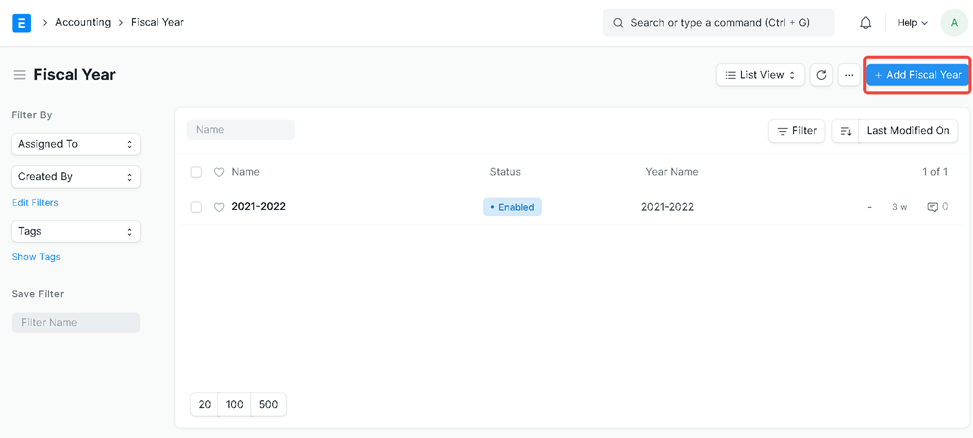
Fiscal Year set up
Click on Accounting>> Fiscal Year
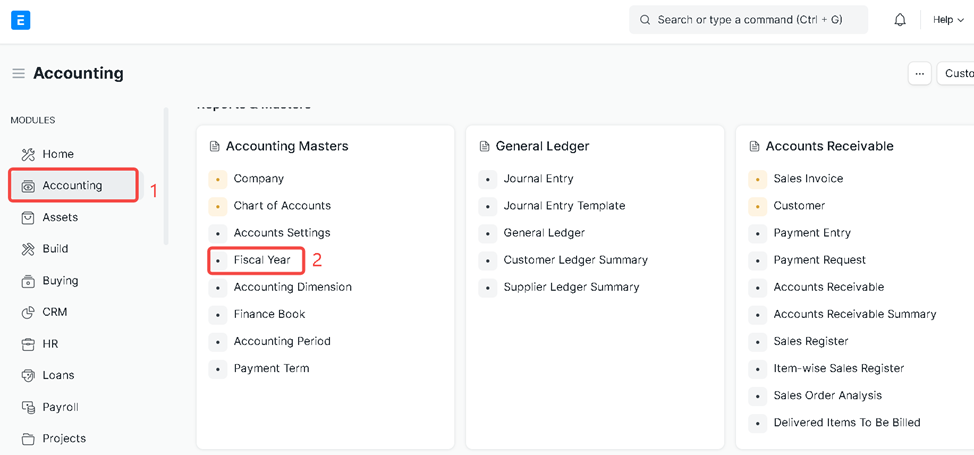
Click on Add Fiscal Year
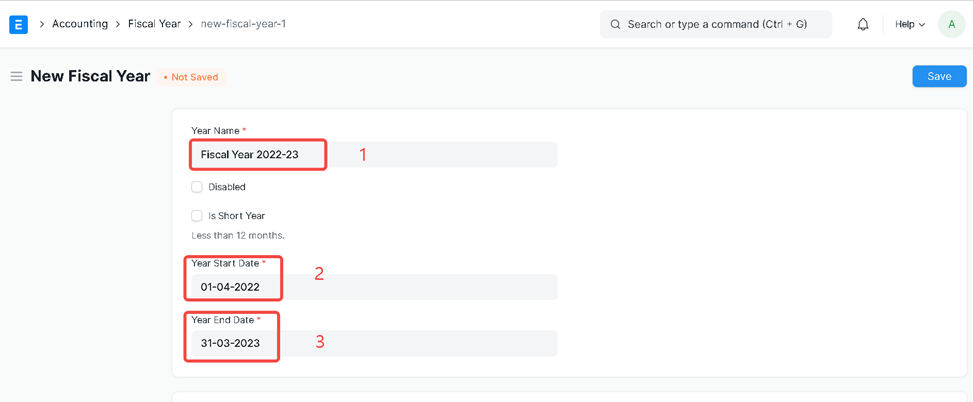
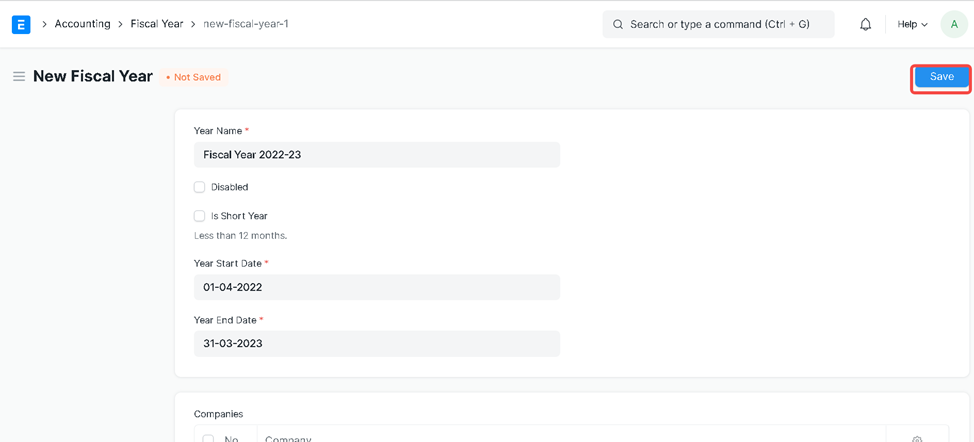
Enter Year Name, Year Start Date, and Year End Date
Click on Add Row to add company
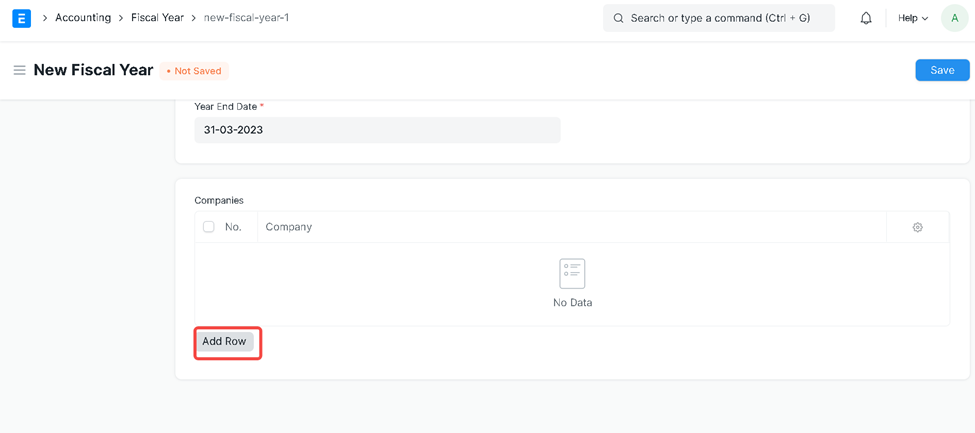
System will auto fetch company name
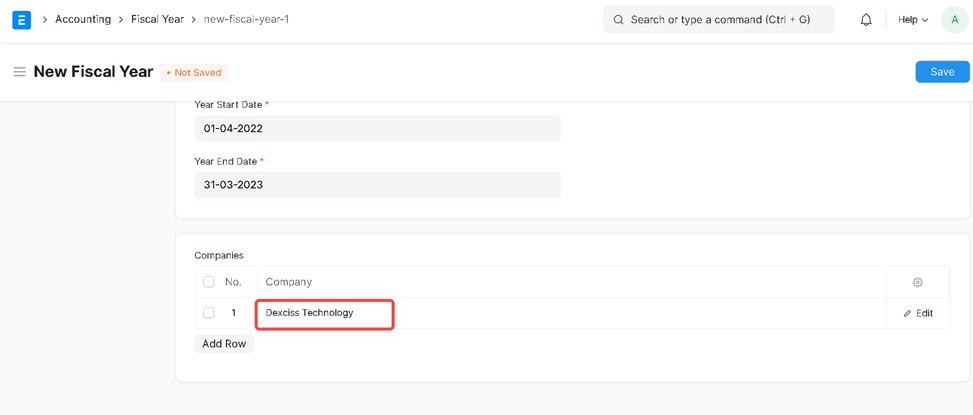
Click on Save
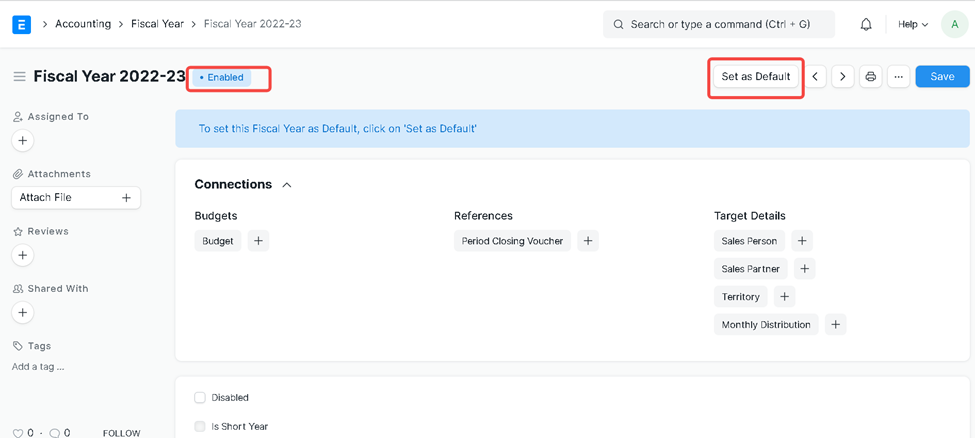
Now the fiscal year is created and we can set this fiscal year as a default
Now go to Global Defaults>>and select current fiscal year
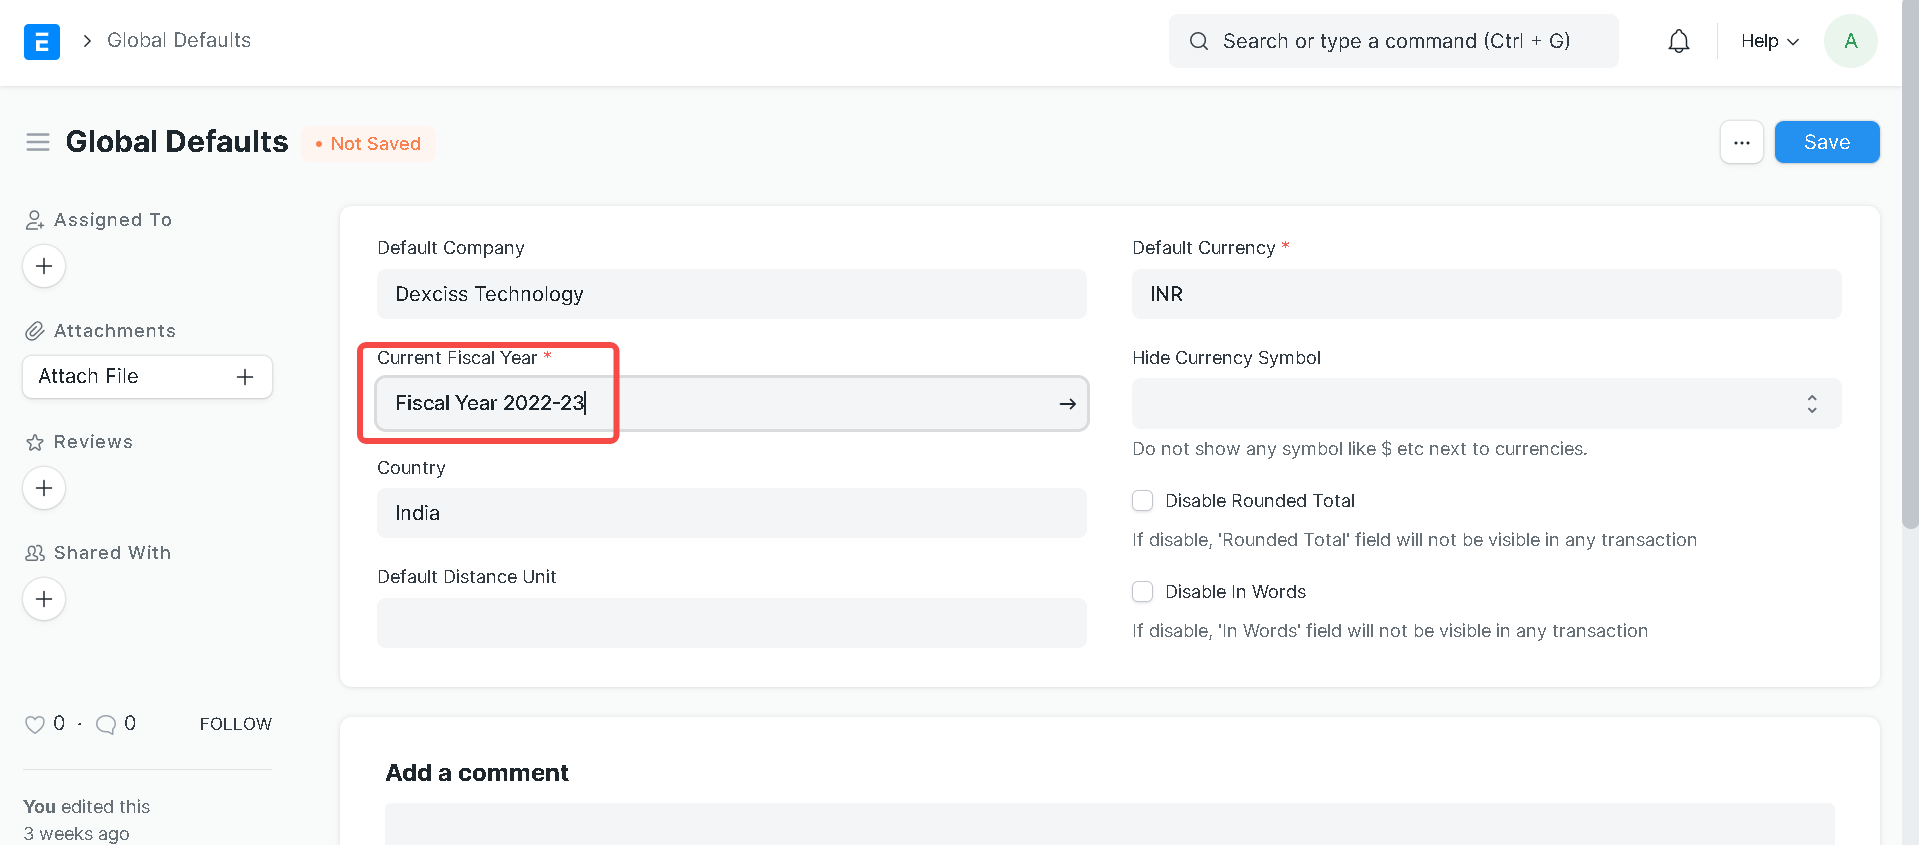
Click on Save
2.Naming Series
Masters and transactions can be given prefixes in the form of naming series.
Naming series creation
- Type Naming series on the search bar
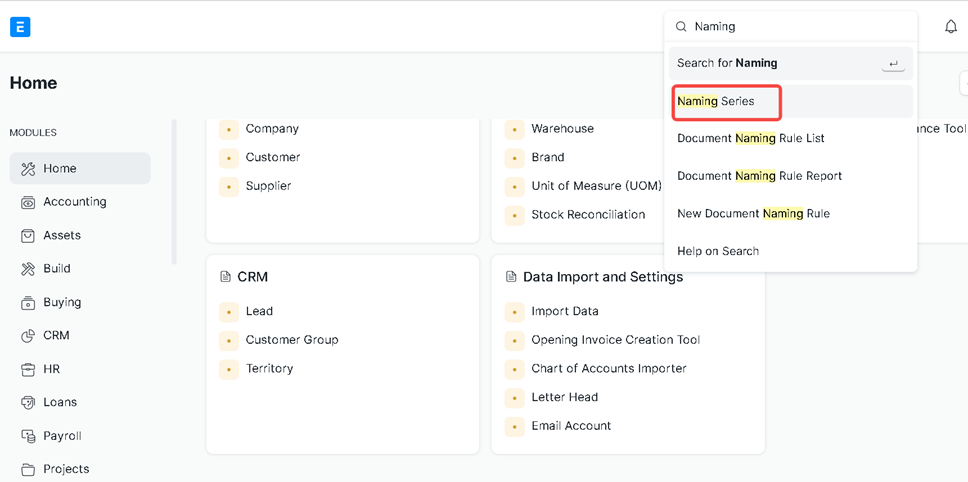
Click on naming series
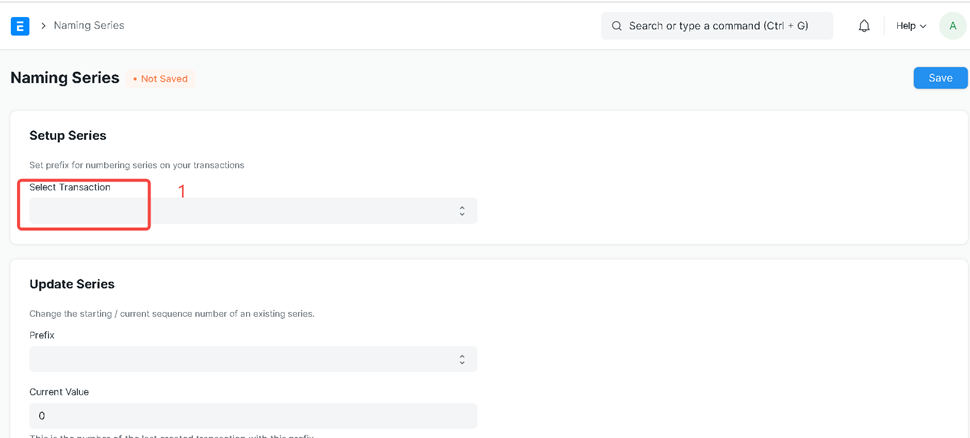
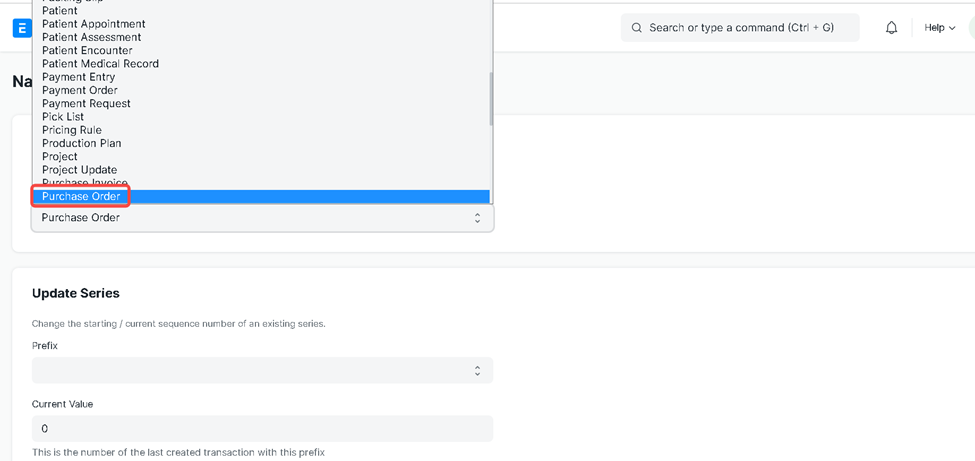
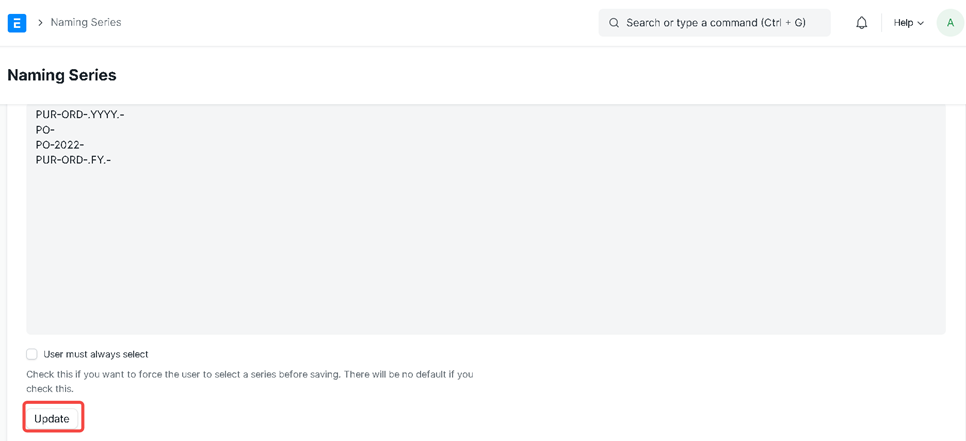
Select document type for that you want to create new naming series, Here we are going to select Purchase order
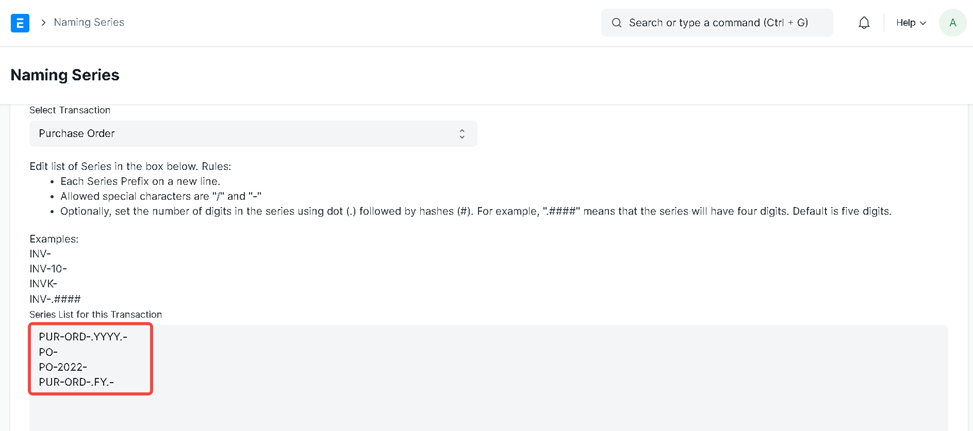
Enter the naming series that you want on purchase order.
In the given example, we have added four types of naming series.
Click on Update and then Save
Now will check the effect of this naming series on Purchase order.
Go to Purchase order and click on Add Purchase order
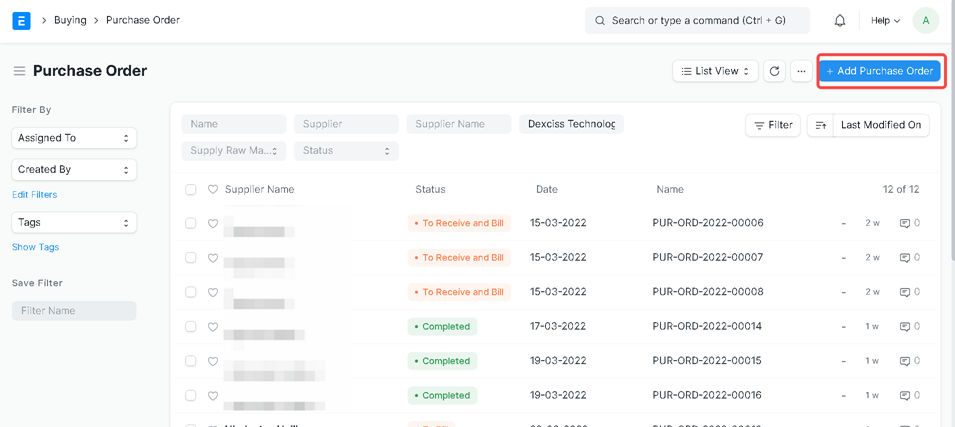
Now click on series, will get drop down to Select required naming series

Now we can see the effect of this configuration.
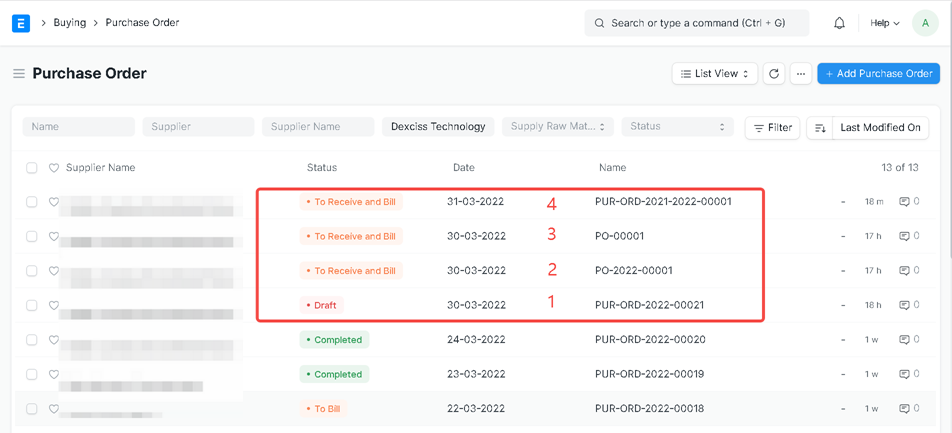
Now we can see the effect of Naming Series
1. PUR-ORD-.YYYY.-
3. PO-
2. PO-2022-
4. PUR-ORD-.FY.-
Note: In this way, we can create a naming series for all transactional documents like Sales order, Sales invoice, Delivery Note, Purchase receipt, Purchase order, Purchase Invoice, Employee, payroll entry ,etc.
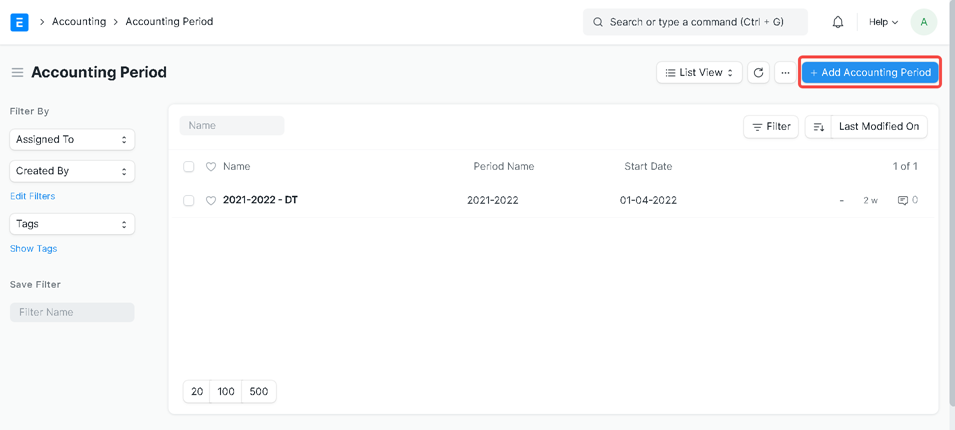
3.Accounting Period
An Accounting Period defines a time period in which financial statements are recorded
Click on Accounting >> Accounting Period
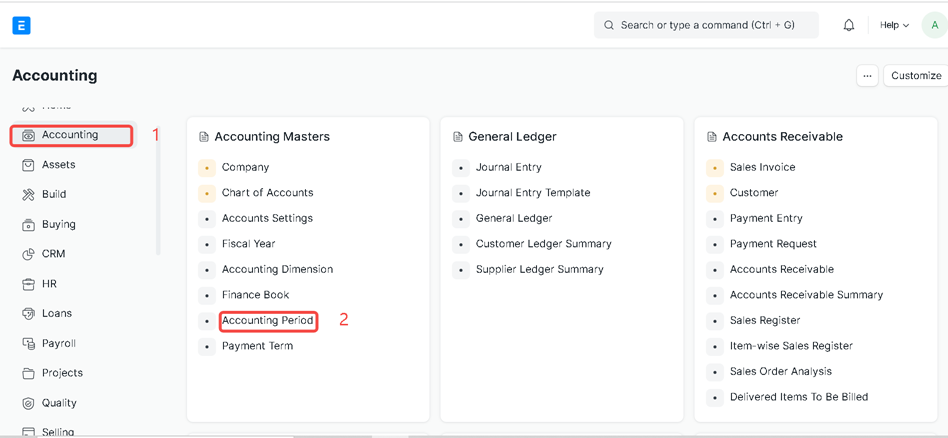
Click on Add Accounting Period
Here enter Period Name, select Period start date and Period end date
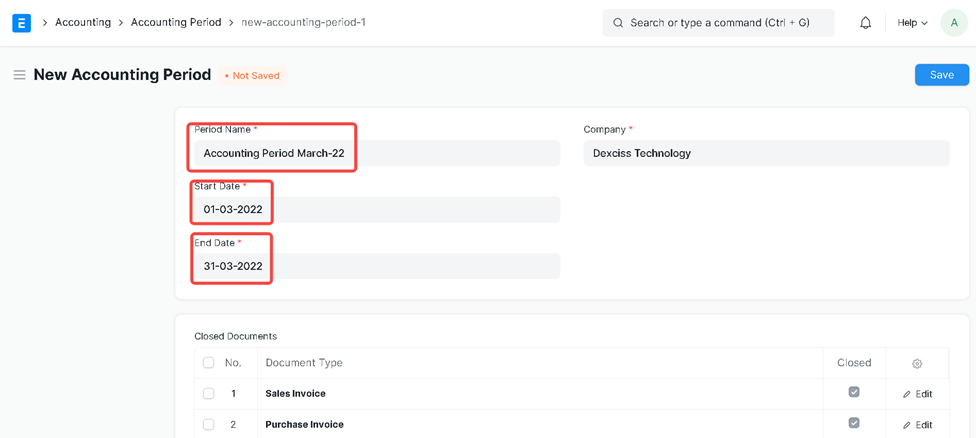
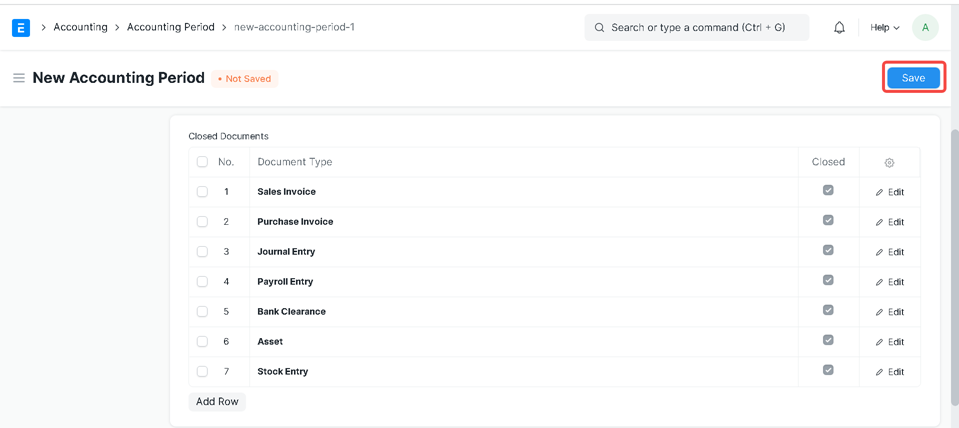
We can add or remove doctype according to our requirement.
1. If the Closed checkbox is true for a particular document type, the System will not allow you to submit the document after the closing period.
2.If we want to post a sales invoice after the closing accounting period, In that case we need to remove the Closed checkbox in front of the Sales invoice.
Click on Save
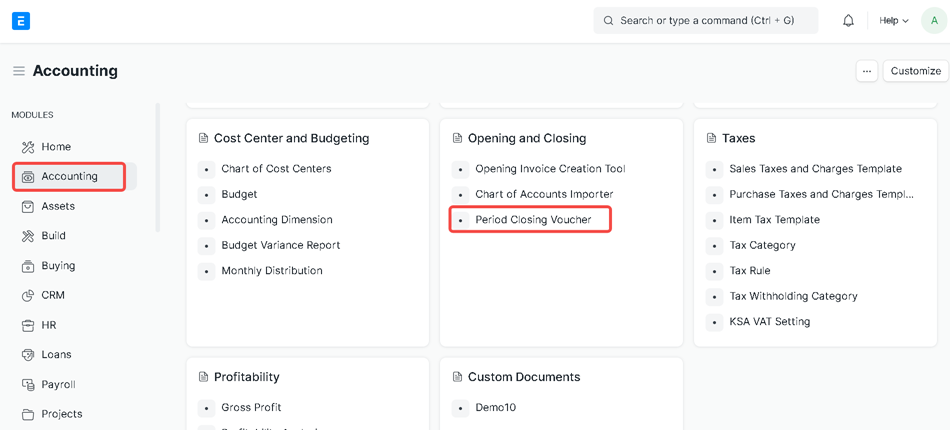
4.Period Closing Voucher
A Period Closing Voucher indicates that the profit/loss for an accounting period has been balanced and the books can start fresh.
Go to Accounting >> Period Closing Voucher
Go to the Period Closing Voucher list and click on New

Select Transaction Date, Posting Date, Closing Fiscal Year, Closing Account Head and enter Remarks
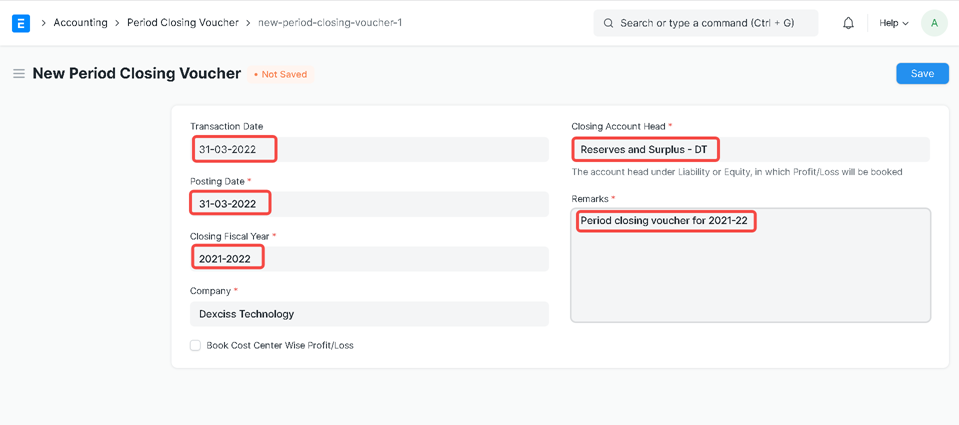
Click on Save and Submit
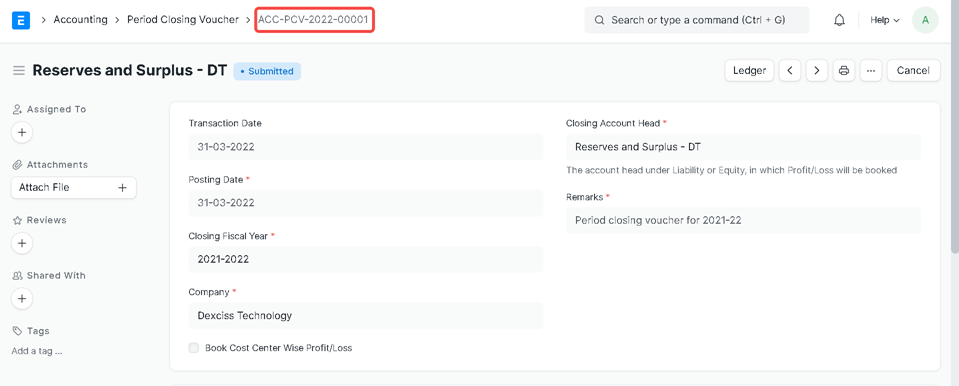
System will auto generate period closing voucher number
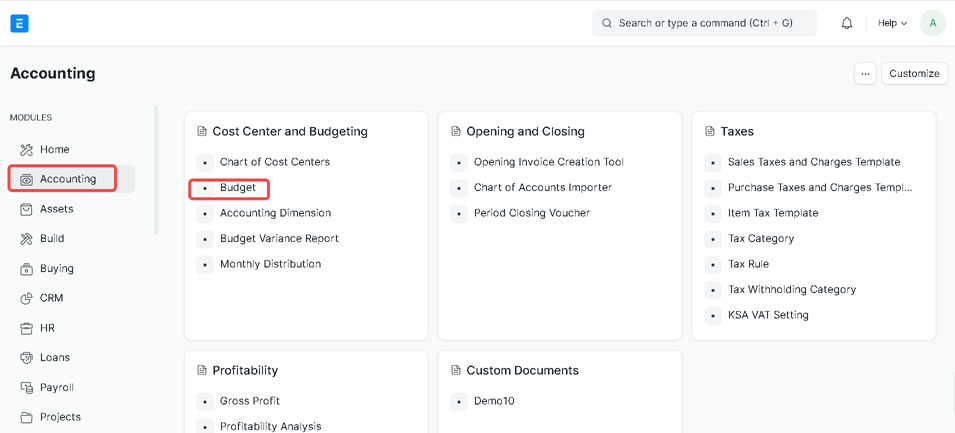
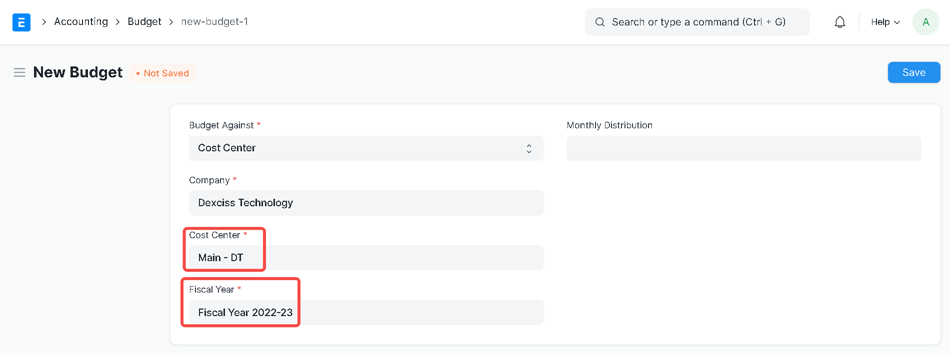
5.Budget
Go to Accounting>> Budget
Click on +Add Budget

Select Budget against Cost center or Project
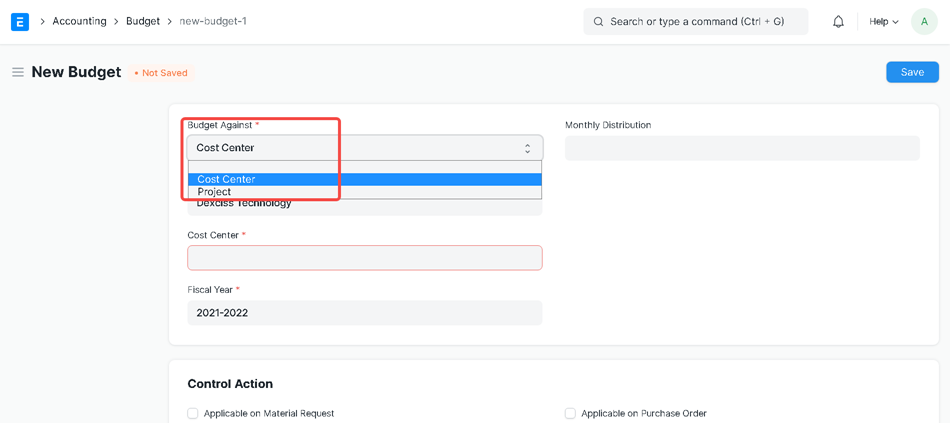
Select Company, Cost Center and Fiscal Year
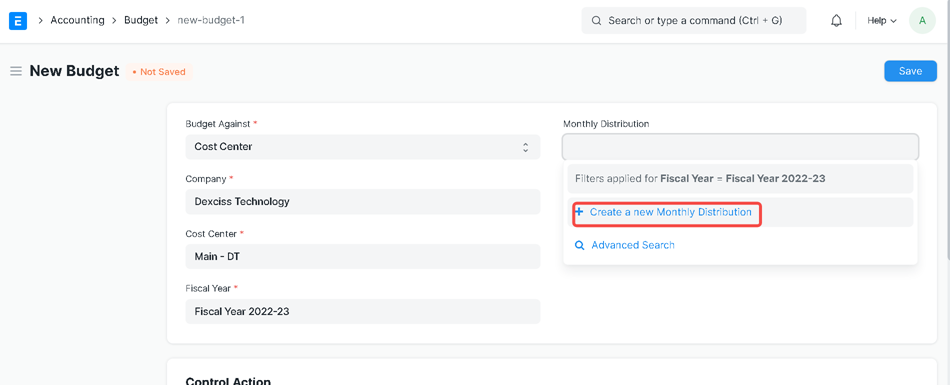
We can Monthly distribute budget
Click on create a new monthly distribution
Enter Distribution Name and select Fiscal Year
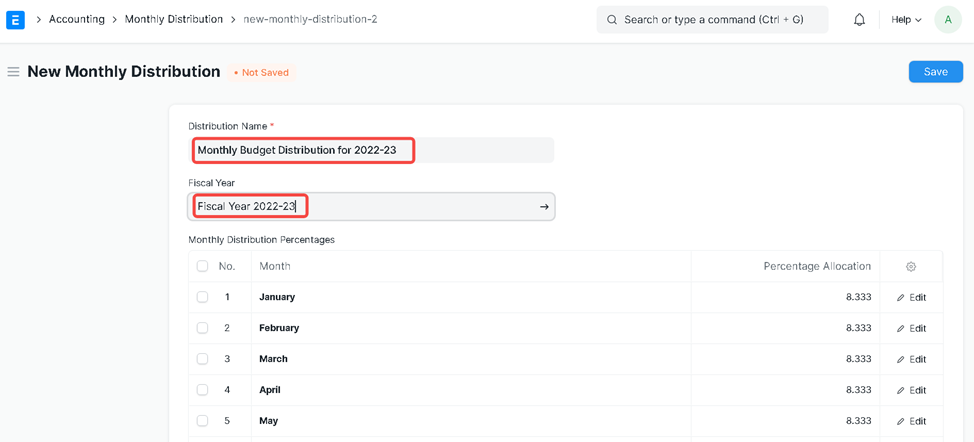
We can modify percentage allocation
Click on Save
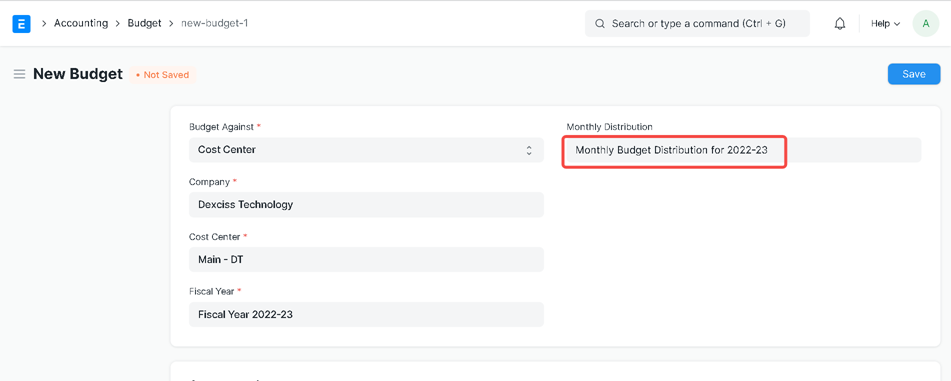
Now again go back to Budget screen
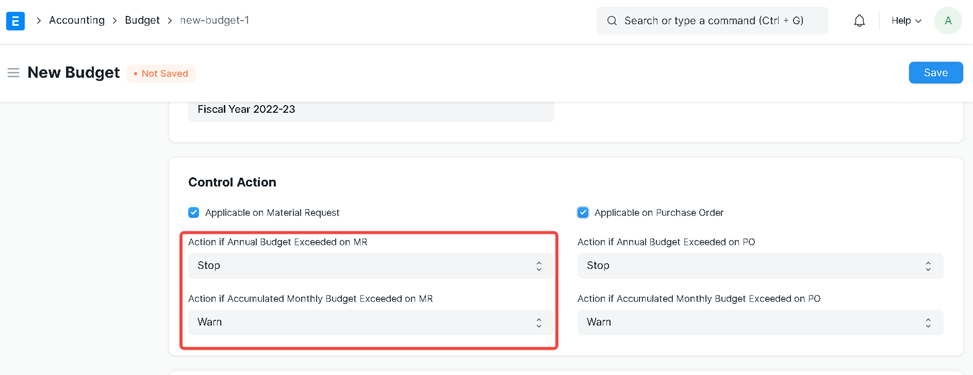
Control action is to restrict users for provided conditions.
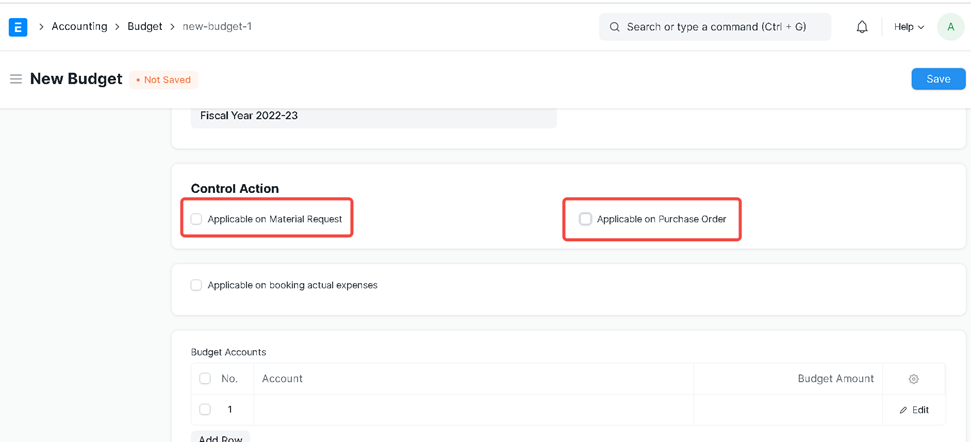
Set these action according to your business requirement
Select Budget account and enter Budget Amount
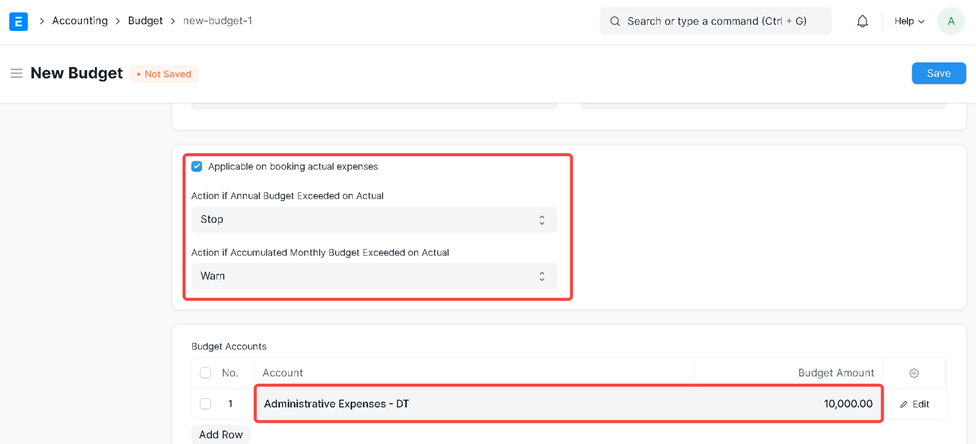
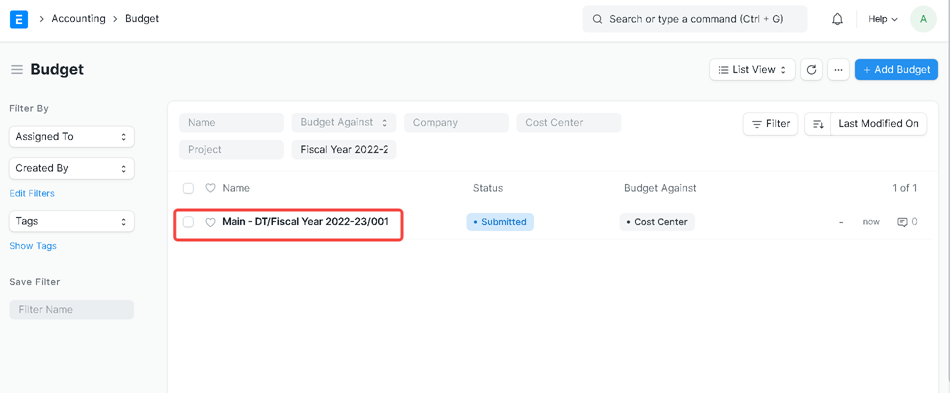
Save and Submit Budget
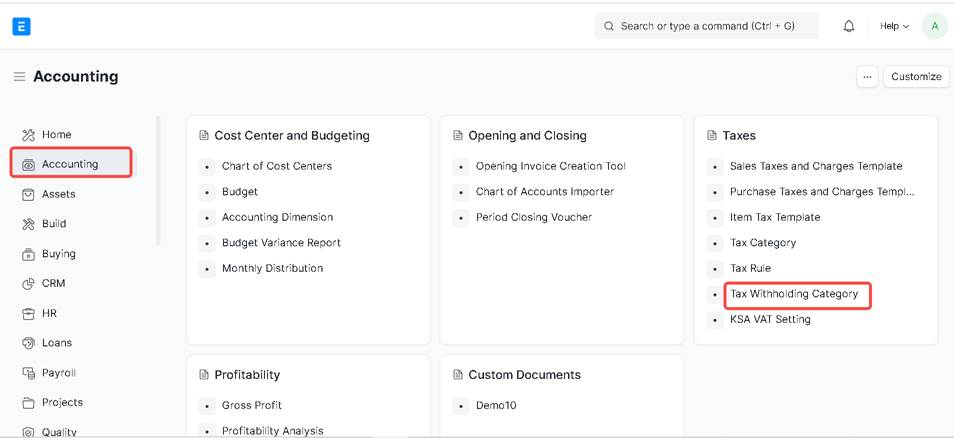
6.Tax Withholding Category - Adding New Fiscal Year
According to this, a person responsible for making payments is required to deduct tax at source at prescribed rates. Instead of receiving tax on your income from you at a later date, the government wants the payers to deduct tax beforehand and deposit it with the government.
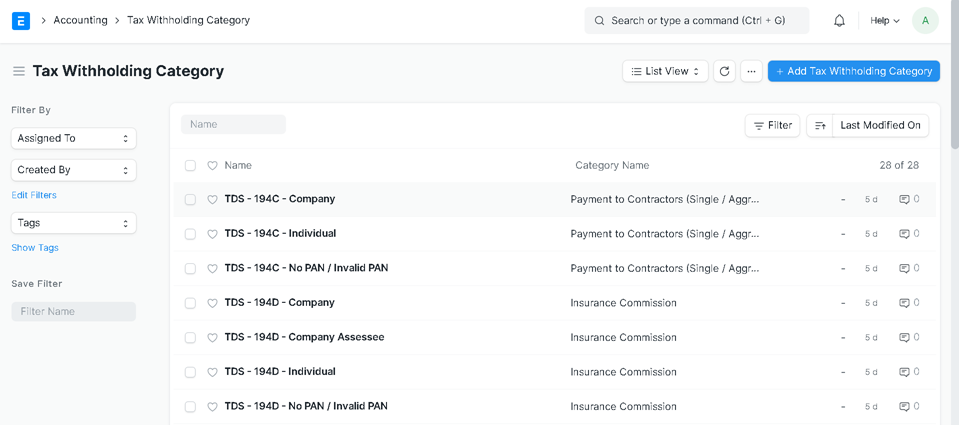
Go to Accounting >> Tax Withholding Category
Click on any category that we want to add new fiscal year
Click on Add Row
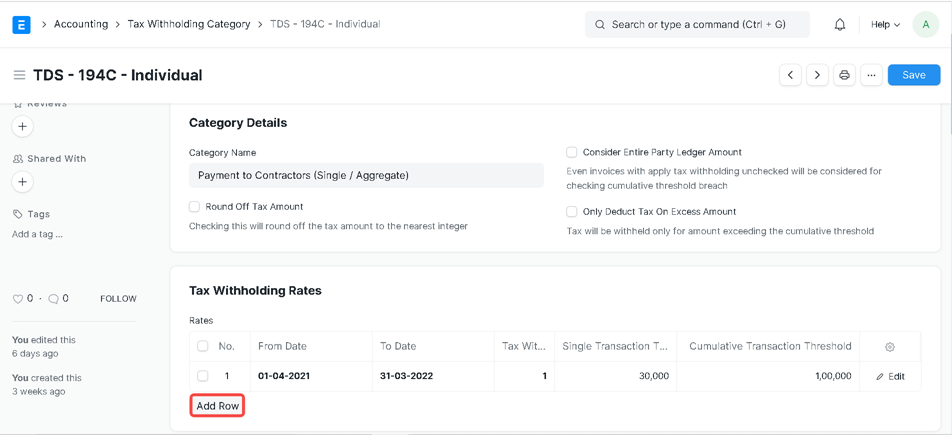
Select From Date, To Date, Tax Withholding Rate, Single Transaction Threshold, and Cumulative Transaction Threshold
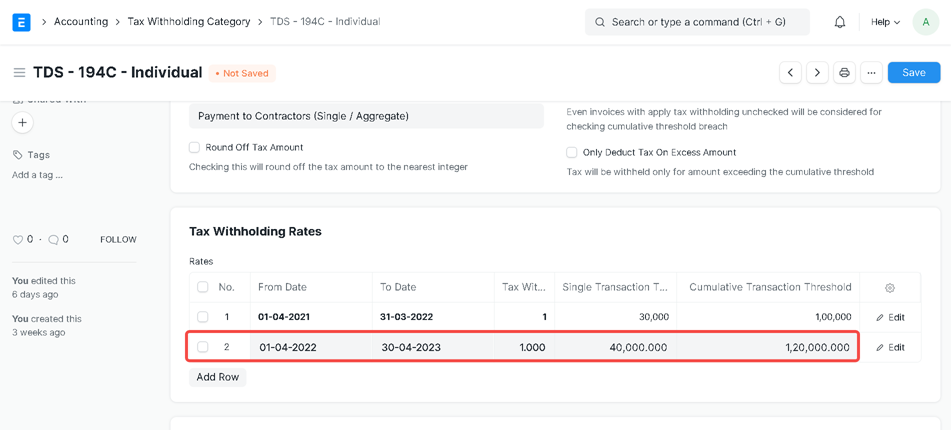
Click on Save